

Qoder CLI model routing and subscription setup
Discover your Qoder subscription models through headless Magpie, then configure difficulty routing in HiRoute. Use DeepSeek-Flash for routine coding and Kimi-K3.1-Pro for harder turns. Connect the route to Qoder CLI, or follow the Codex Desktop screenshots below if your Qoder setup does not support BYOK.
Download HiRoute · Browse Agent guides
1. Scan or sign in to get models · 2. Configure smart routing · 3. Connect your Agent · 4. Explore task delegation
1. Scan or sign in to get models
Use headless Magpie to discover the models available to your Qoder subscription, then connect them to HiRoute. Magpie handles sign-in and exposes the local model API.
Install the Magpie CLI on the host running HiRoute. Choose the startup method for your system.
- On macOS or Linux with systemd, run
magpie daemon install --no-web, then check the service withmagpie daemon status. Runmagpie daemon startto start an installed service. - On Windows or hosts without service installation, run
magpie servein a separate terminal and keep it running.
If the gateway is already running, go straight to sign-in.
Run magpie login qoder. If you use the community plugin, run magpie plugin add @magpie-community/opencode-qoder-auth followed by magpie plugin login qoder. For Qoder CN, use magpie plugin login qoder-cn.
Complete authorization in the browser, then query the catalog. Use curl.exe in Windows PowerShell.
curl -fsS -H 'Authorization: Bearer magpie' http://127.0.0.1:3425/v1/models
Choose complete IDs returned for your account. For example, qoder/dfmodel is DeepSeek-Flash and qoder/kmodel_latest is Kimi-K3.1-Pro.
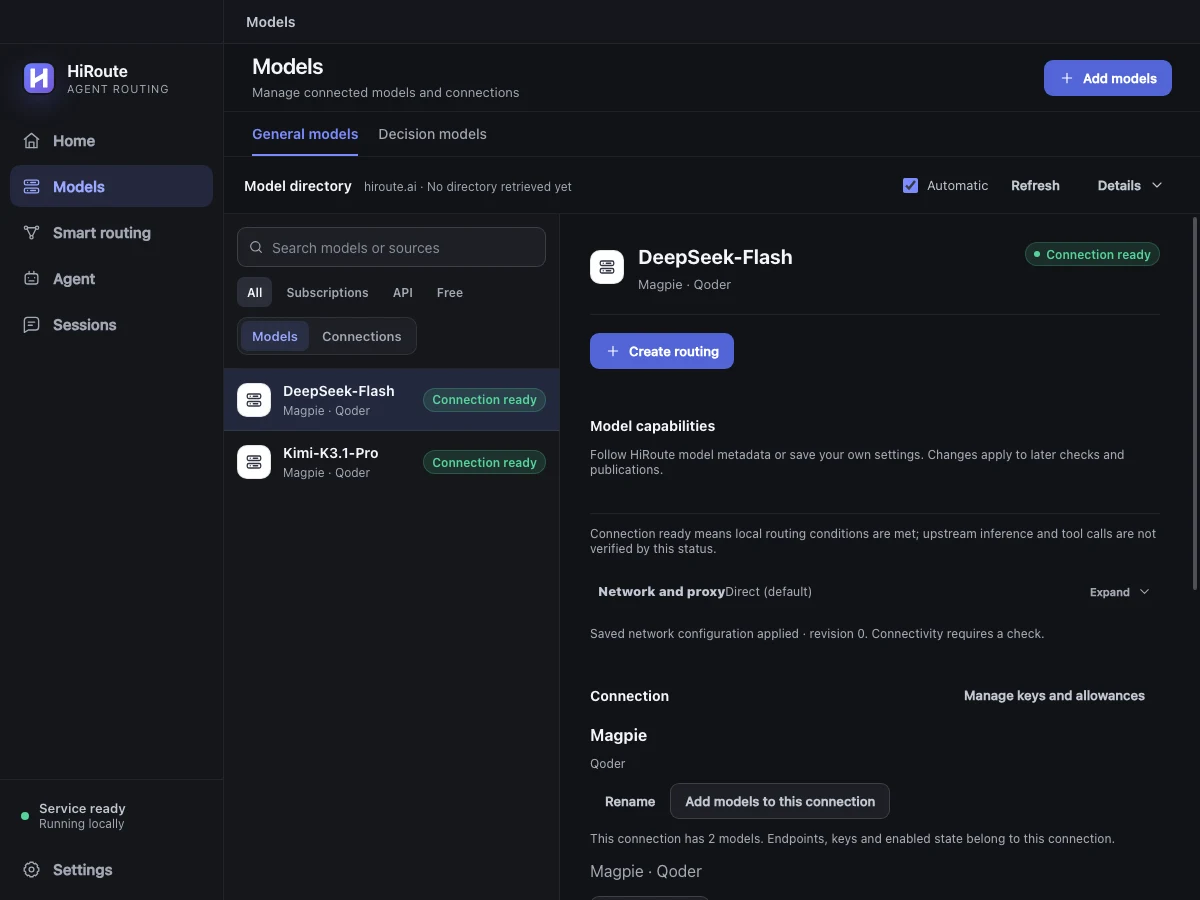
In HiRoute, open Models → General models → Add models → New API connection → Custom API and fill in the connection.
| Setting | Value |
|---|---|
| Connection name | For example, “Magpie Qoder” |
| API base URL | http://127.0.0.1:3425/v1, or your gateway's address |
| Protocol | Responses for the Codex Desktop setup below |
| API key | magpie for the default local gateway, or your configured key |
| Models | Select from the returned catalog, keeping the full source prefix |
Click Check and continue, select models and save. If the catalog does not appear, set the model directory path to /v1/models under Advanced settings, or enter the complete IDs you just retrieved. If a supported Agent configuration already points to this gateway, try Scan this device to find and reuse the connection.
2. Configure smart routing
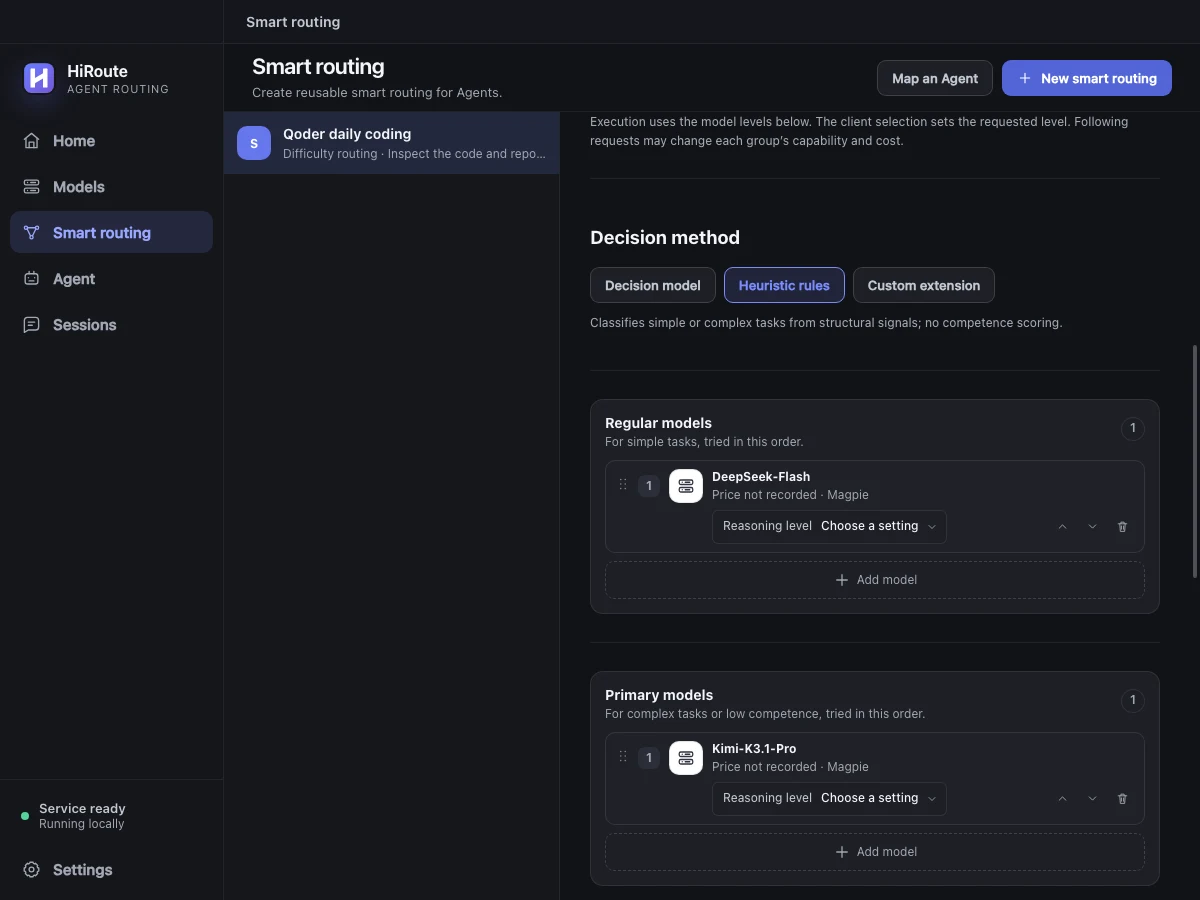
- Open Smart routing → New smart routing, name the plan “Qoder daily coding” and choose Difficulty routing.
- Click Add model in Regular models and choose a fast or economical model from step 1 for reading files, finding definitions and gathering facts.
- Add a model to Primary models for complex analysis, planning or changes across several files. Combine available models from different subscriptions, APIs or local connections as needed.
- Start with Heuristic rules under Decision method, then click Enable. The published route becomes available in the Agent settings in the next step.
To adjust routing using execution feedback, select a decision model in the same section for stage scoring and low-score protection. Learn about difficulty decisions
3. Connect your Agent
If custom models are available, connect Qoder CLI. You can also open this route in Codex Desktop.
Use Qoder CLI
For a Qoder CLI setup that supports custom models / BYOK, sign in to Qoder first. In HiRoute, open Agent → Qoder → Model routing, check “Qoder daily coding” and save.
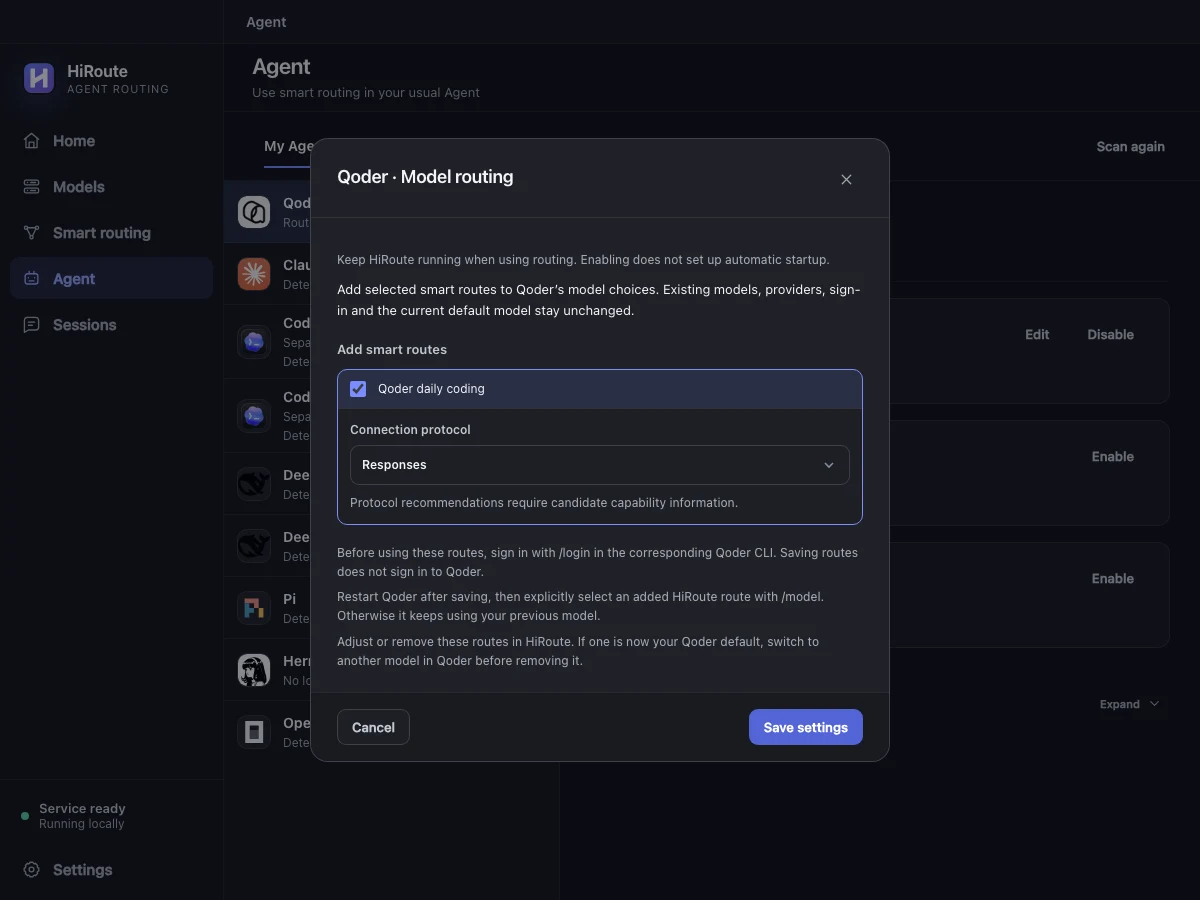
Restart Qoder CLI, select the route with /model and start a task. Inspect the routing choices in HiRoute's Sessions → Routing timeline.
Use Codex Desktop when Qoder has no BYOK entry
If your Qoder version or plan does not expose custom models / BYOK, use Codex Desktop with the Qoder models and smart route you already connected. Choose the “Qoder daily coding” plan in the steps below.
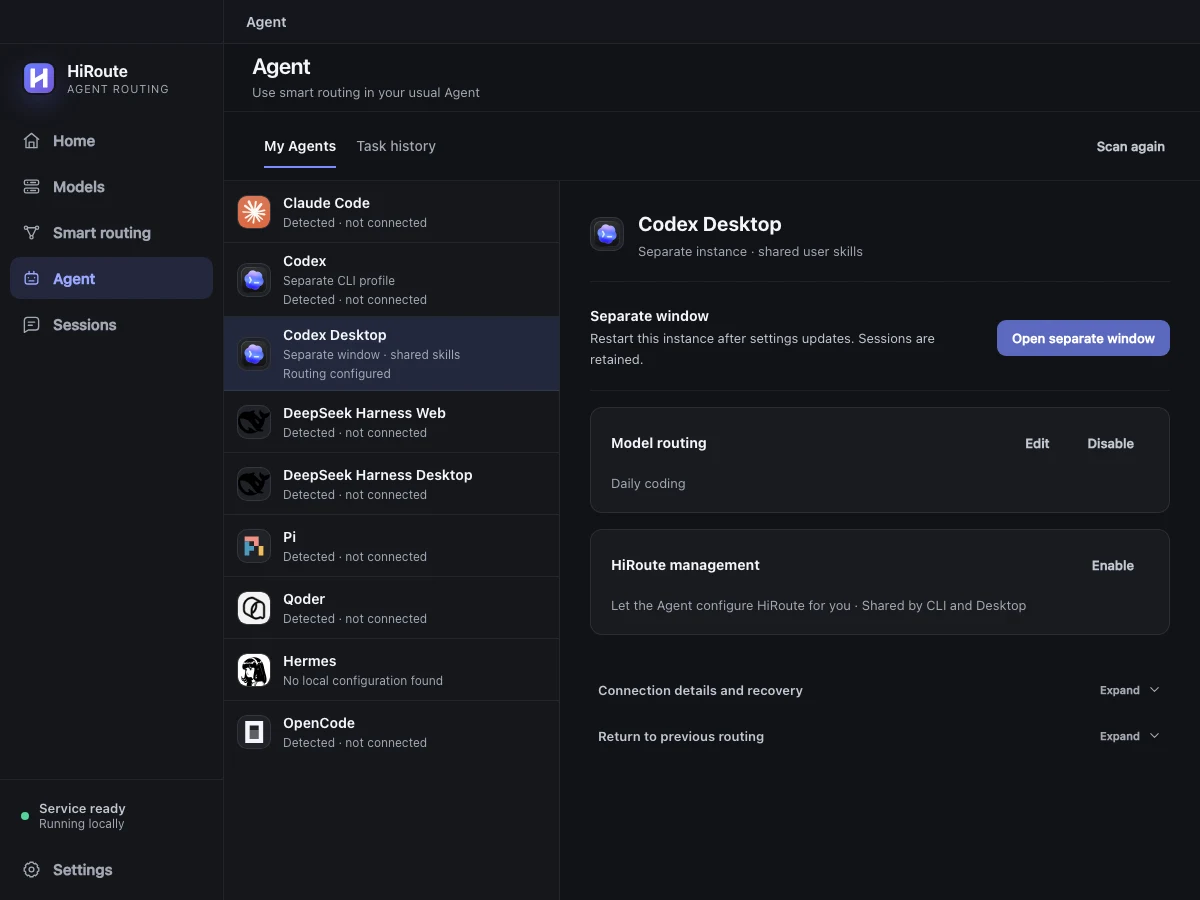
- Install the ChatGPT / Codex desktop app on macOS or Windows, then open HiRoute Desktop → Agent → Codex Desktop.
- Click Choose routes and enable. For an existing connection, click Edit beside Model routing. Check your published plan. A single route becomes the default automatically; if you choose several, pick your preferred route under Default selection. Click Enable or Save settings.
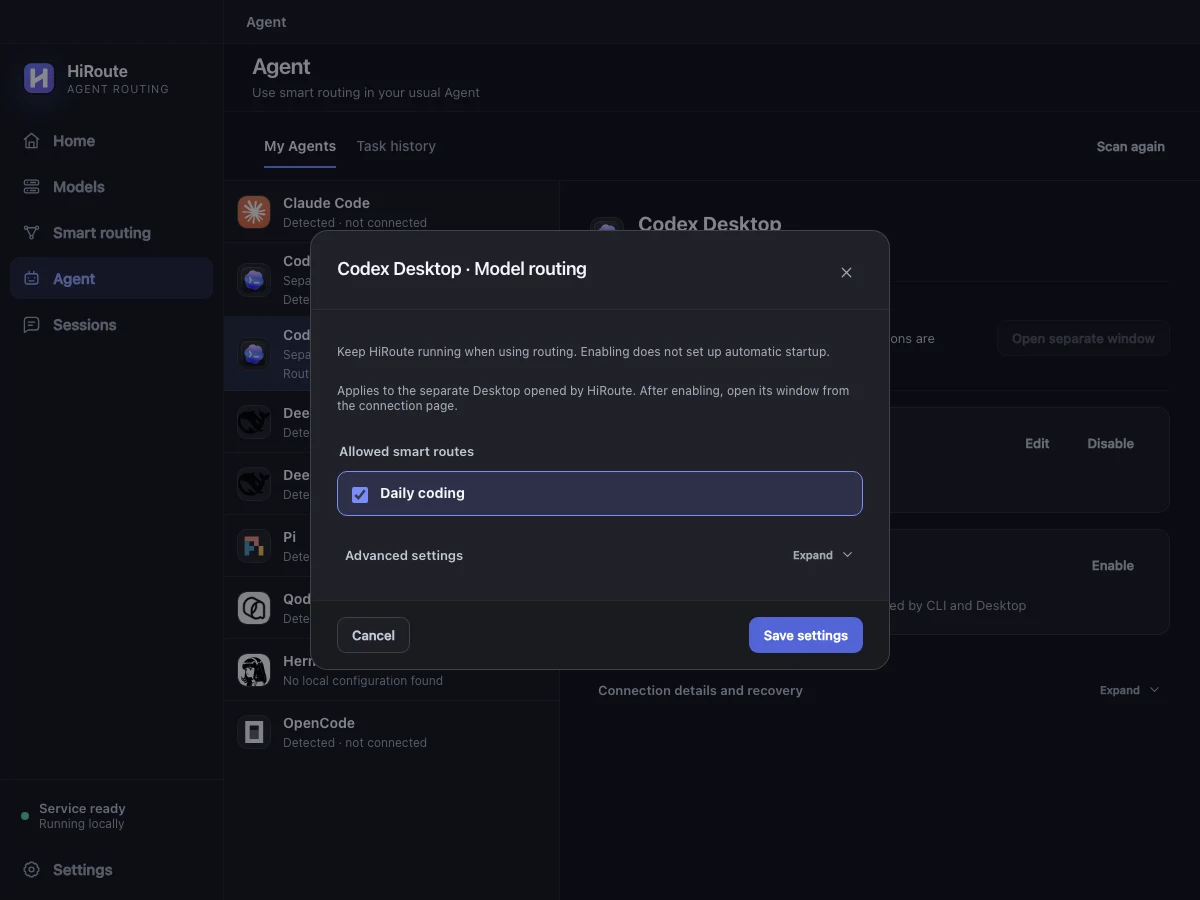
- Back in the Codex Desktop details, click Open separate window in the Separate window section. HiRoute opens a desktop window configured to use your route.
- Choose a project in the new window and click New chat. Confirm or choose your new route in the model picker at the bottom right of the composer. Try “Find this project’s startup entry points and explain how they connect.” In HiRoute, open Sessions → Routing timeline to see the models selected.
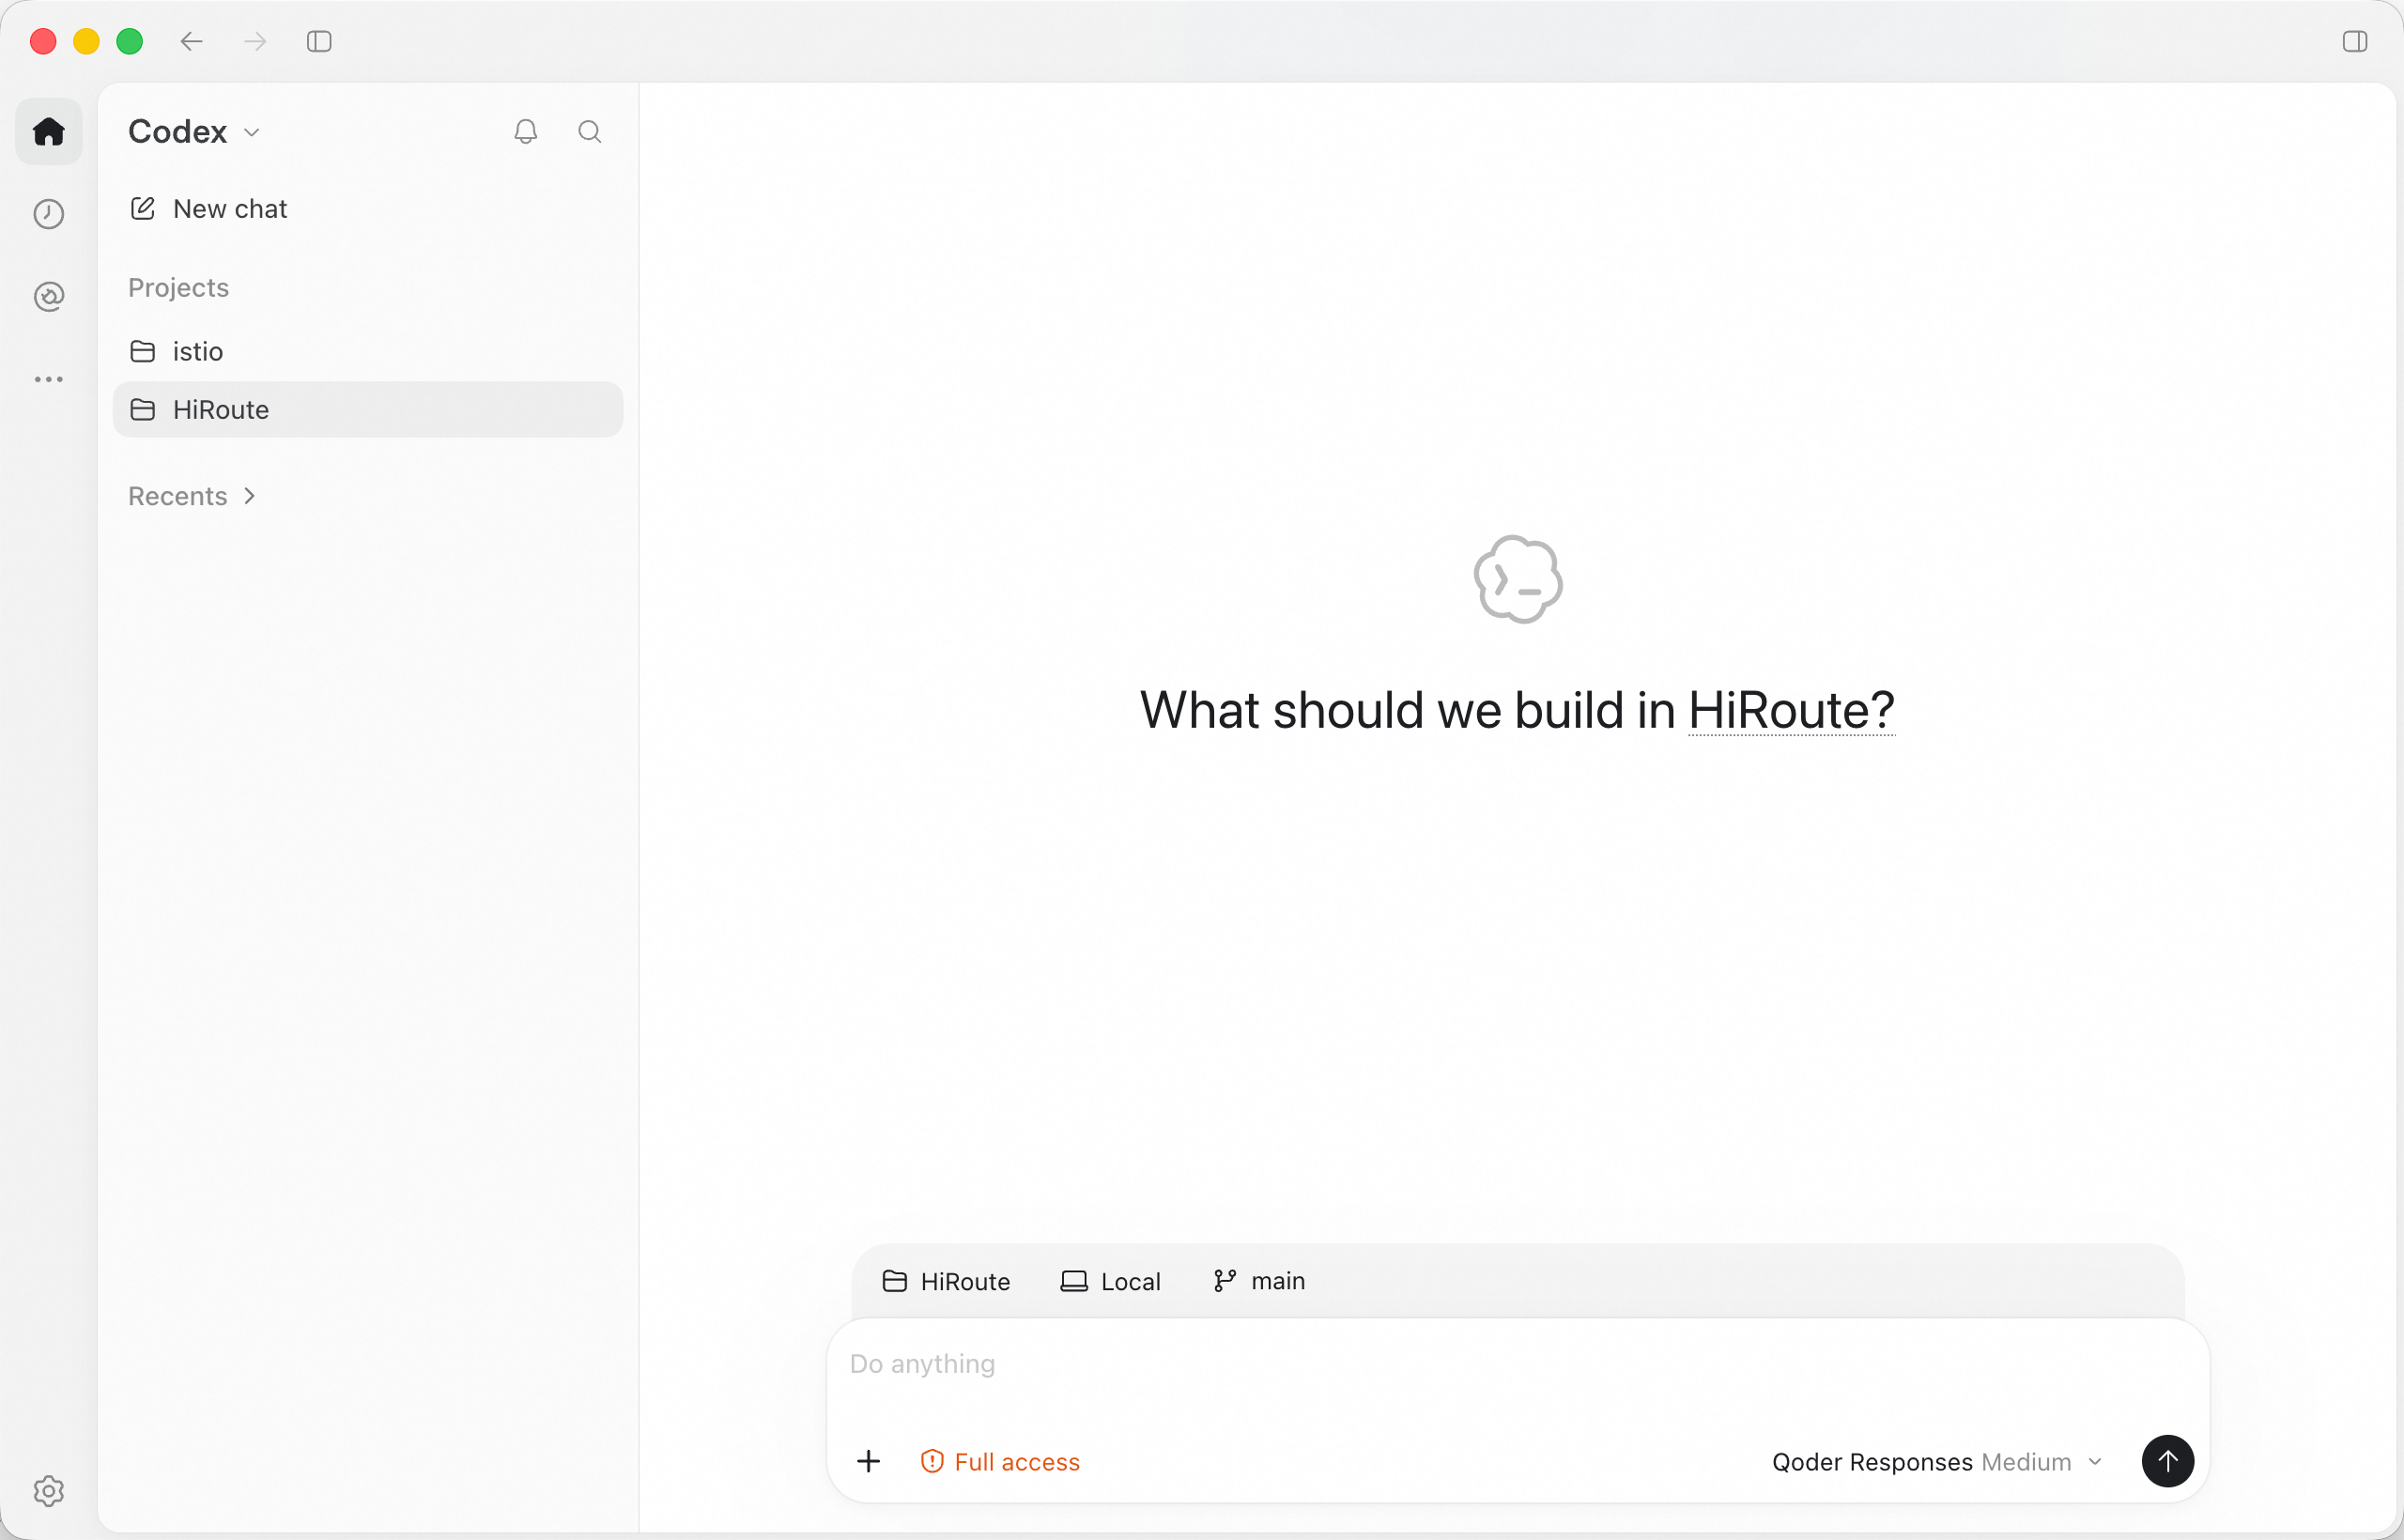
After changing route settings, quit this instance and open it again with the same button.
4. Explore task delegation
Before adding a feature, let lightweight Pi find the module's entry points, callers and tests. An economical model handles repeated searches. Your Qoder conversation can start design work from a short index with file locations.
Create a Fixed model route called “Pi module index”. Under More settings → Task delegation, allow delegation and choose Pi, give it a purpose and enable it. Turn on Task routing in the Qoder entry for Qoder CLI. If you use the separate Desktop setup above, send delegated tasks from Codex CLI.
Use HiRoute to hand this module to “Pi module index”. List its entry points, direct callers and relevant tests with file paths.
Start with one module and compare usage in the main conversation and the delegated task. Set up lightweight Pi delegation