

Codex API credits and subscription routing
Connect your ChatGPT subscription and the OpenAI API organization that received your credits. With two sources for the same GPT model, Codex can use API credits when the subscription reaches its limit, or use credits that are close to expiring first. Then select the route in a separate Codex Desktop window or in Codex CLI.
Download HiRoute · Browse Agent guides · Use your Codex subscription API credits
1. Scan or sign in to get models · 2. Configure smart routing · 3. Connect your Agent · 4. Explore task delegation
1. Scan or sign in to get models
With a ChatGPT subscription, sign in and choose the Codex models available to your account.
- Open Models → General models → Add models → Connect subscription.
- Click Sign in on the Codex card. Complete authorization with your ChatGPT account in the browser, then return to HiRoute.
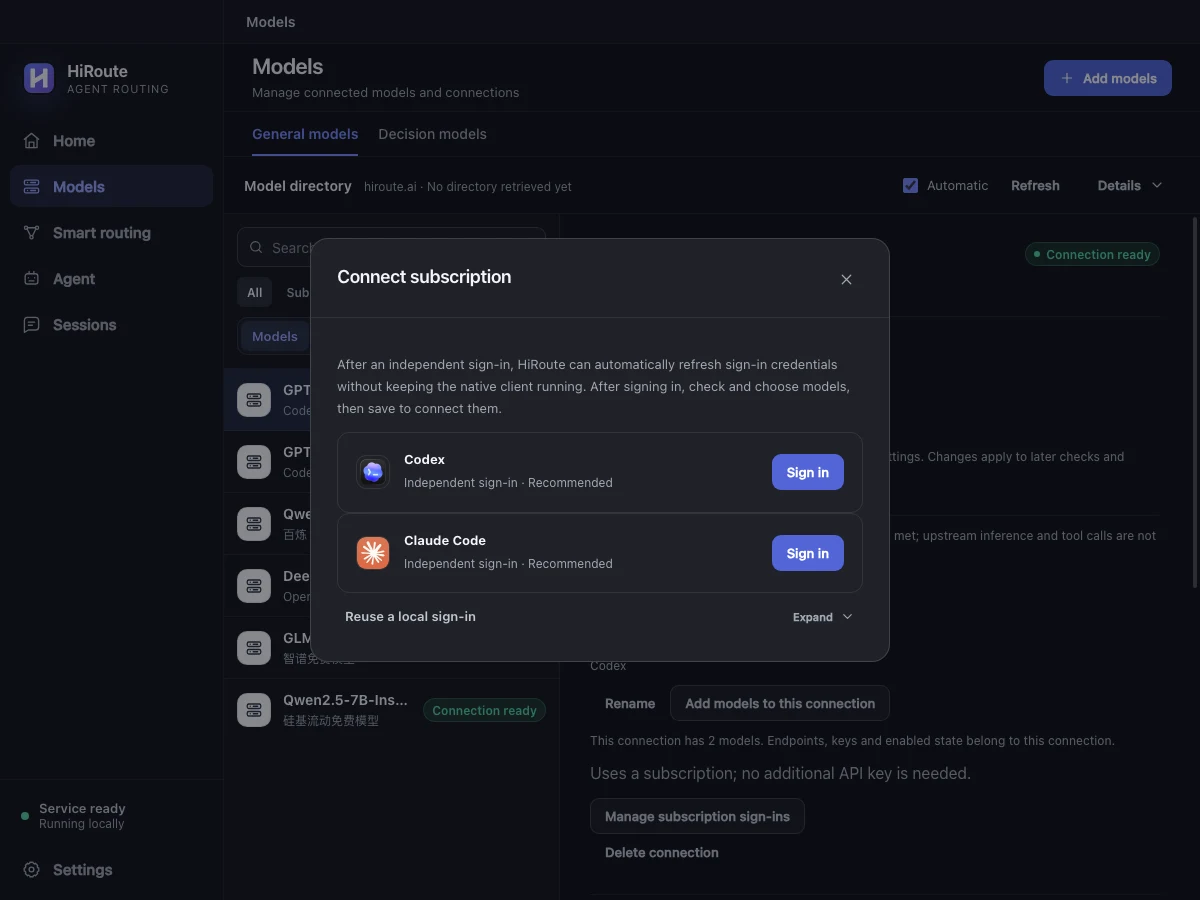
- When the card says Signed in. Check and choose models, click Check and choose models, then Check subscription. The available models appear when the check completes.
- Select the models you want. To add credits as well, enter the receiving organization's API key. Click Save and connect and confirm the models appear under General models.
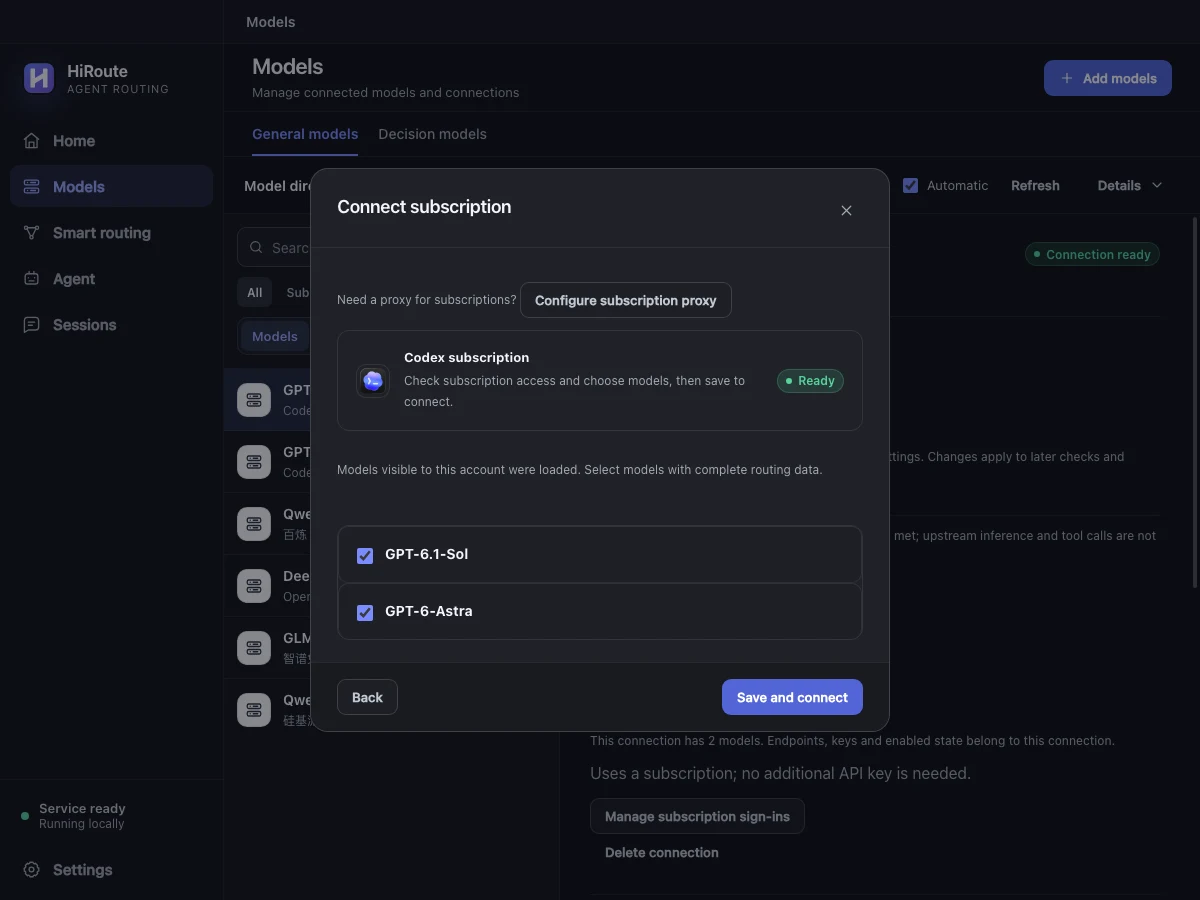
For an existing Codex setup, Add models → Scan this device can find supported subscription or API settings. Check and save the connection. Codex sign-in reuse supports credentials stored in a file. For a system keychain sign-in, use the independent Connect subscription flow above. You can also add an API key through New API connection.
Connect OpenAI API credits from your ChatGPT subscription
Eligible ChatGPT Pro and Business subscribers can claim OpenAI API credits. Link your subscription to the API organization receiving the credits, then create a project API key in that organization. Pay-as-you-go requests through that key can draw on the credits. Check eligibility, balance and expiry in the official OpenAI API credits guide.
- Select the models in the checked subscription. Enter the receiving organization's key under OpenAI API Key (optional), or choose a connection from that organization under Use an existing API connection.
- Click Save and connect. HiRoute imports the subscription models and their supported exact-ID counterparts from the API. For a saved subscription, select it in General models → Connections, then choose Associate an API connection or Edit association under Subscription and API.
- To budget API use around the credits, turn on Limit API spending during setup or later in the key's details. Use the provider's remaining credit amount and set a renewal schedule if the grant recurs. With model prices set, requests that exceed the local allowance can try the next available candidate. See API key allowances.
You can combine subscription and API candidates for the same model and reuse the credit-funded connection for OpenAI Decisions.
2. Configure smart routing
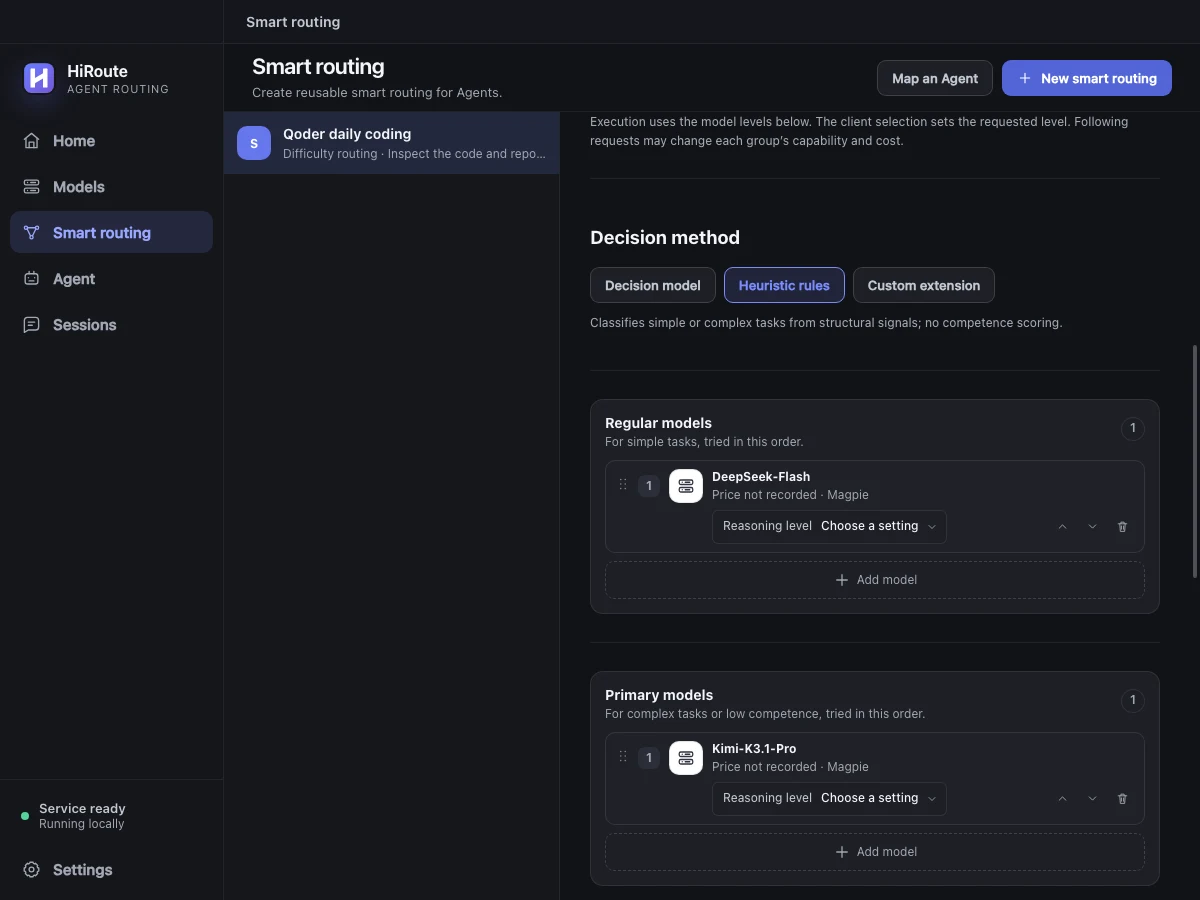
- Open Smart routing → New smart routing, name the plan “Daily coding” and choose Difficulty routing.
- Click Add model in Regular models and choose a fast or economical model from step 1 for reading files, finding definitions and gathering facts.
- Add a model to Primary models for complex analysis, planning or changes across several files. Combine available models from different subscriptions, APIs or local connections as needed.
- Start with Heuristic rules under Decision method, then click Enable. The published route becomes available in the Agent settings in the next step.
Use API credits for an OpenAI decision model
Codex can keep using subscription models to run tasks while the OpenAI API connection from step 1 handles difficulty judgments and stage scoring.
- Open the Difficulty routing plan you created above. Under Decision method, select Decision model and click Add decision model.
- Under Credentials, select Use existing API connection and choose the OpenAI connection that uses your credits. HiRoute reuses the keys in that connection.
- Set the model ID to
gpt-6-luna, the complete URL tohttps://api.openai.com/v1/decisions, and the protocol to OpenAI decisions. Check any prefilled values. Name it “OpenAI difficulty judge” and click Save and test. OpenAI Decisions documentation - Return to the route, confirm the saved decision model is selected, and click Publish changes. After connecting Codex, try a small task and check its difficulty judgment and execution model under Sessions → Routing timeline.
Decision calls can draw on the API credits in the OpenAI organization linked to this connection. Even if an execution candidate uses the same key, decision calls do not consume HiRoute's local key spending allowance. Learn about stage scoring and low-score protection
After a task, ask your Agent to review model switches and tune decision prompts and trust to check whether the primary allowance went to stages that needed it.
Add the subscription and API credits as same-model candidates
To use one model across the two sources, create a Fixed model route. Open Models → General models and switch to the Models view. Open the model from the source you want to use first. Click Create routing, then Add together as candidates in Matching models found. Check that the list contains the subscription and API sources you want. Set their order and enable the route. For an existing fixed route, new candidates are appended. Reorder them in the editor and publish the changes. Select the published route in Codex in the next step.
- Subscription first. Put the subscription first and let the API use credits when subscription quota is unavailable.
- Credits first. Put the API first when credits are close to expiring. Set a key allowance based on the credit balance so the subscription can take over when the allowance is too low.
For difficulty routing, use Add model to choose the subscription and API entries for the same model. Put both in the same Regular or Primary group and order the sources within that group.
3. Connect your Agent
Choose the separate Codex Desktop window or Codex CLI based on the client you use.
Use Codex Desktop
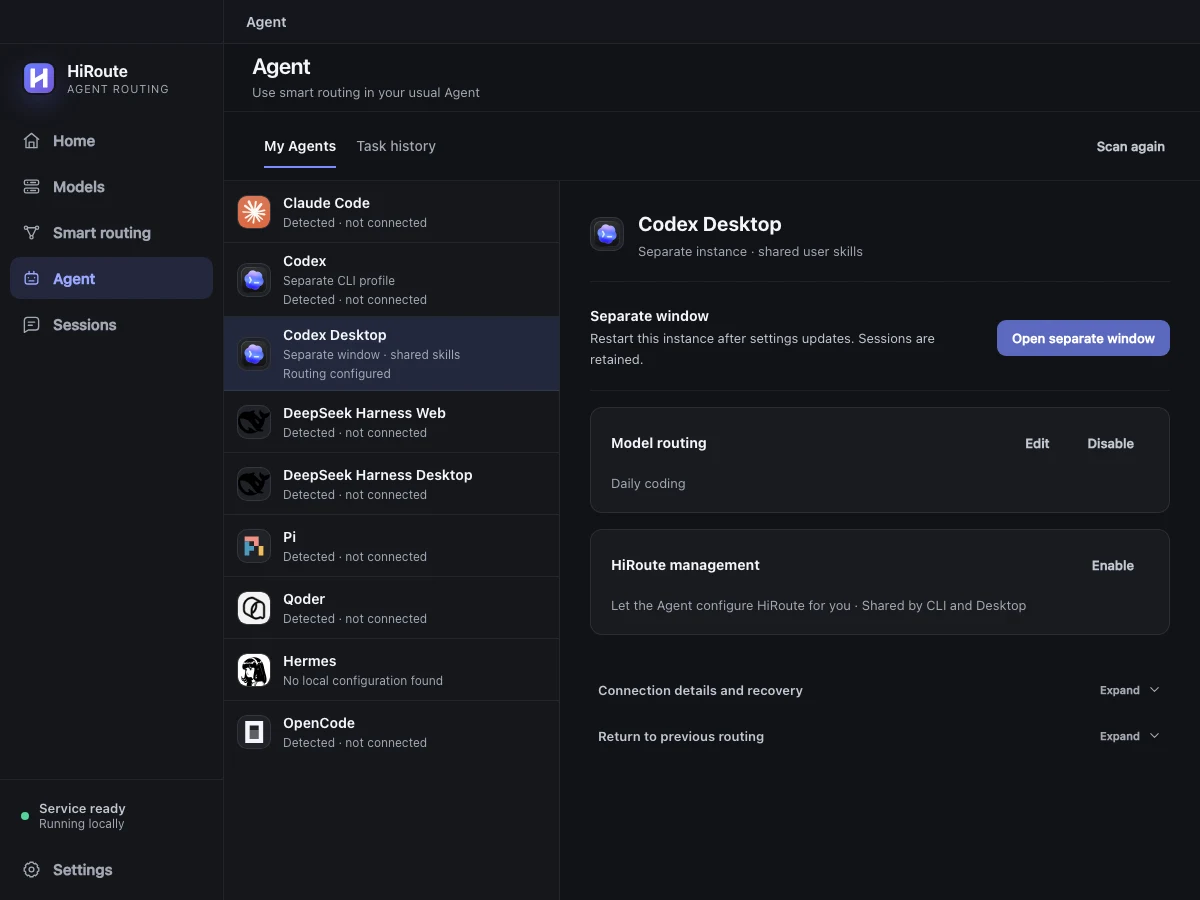
- Install the ChatGPT / Codex desktop app on macOS or Windows, then open HiRoute Desktop → Agent → Codex Desktop.
- Click Choose routes and enable. For an existing connection, click Edit beside Model routing. Check your published plan. A single route becomes the default automatically; if you choose several, pick your preferred route under Default selection. Click Enable or Save settings.
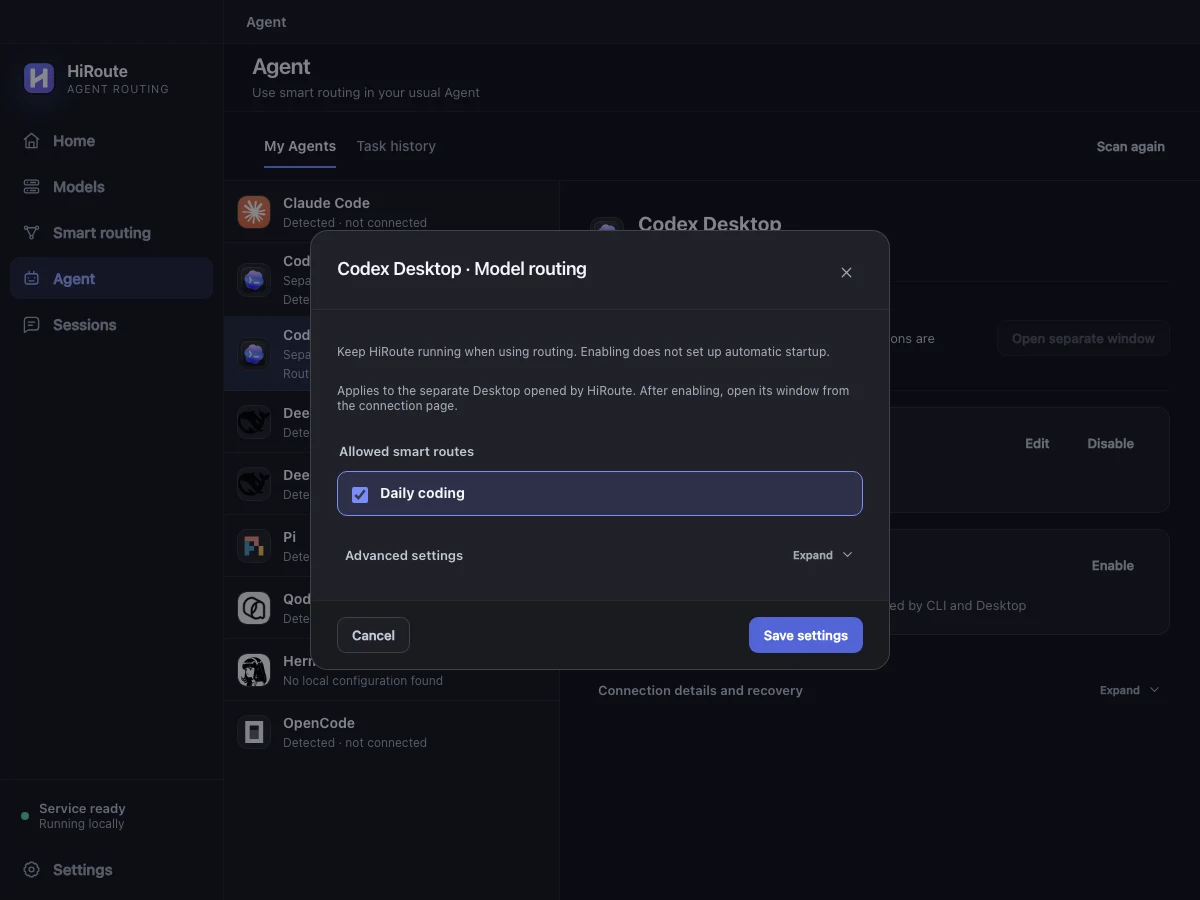
- Back in the Codex Desktop details, click Open separate window in the Separate window section. HiRoute opens a desktop window configured to use your route.
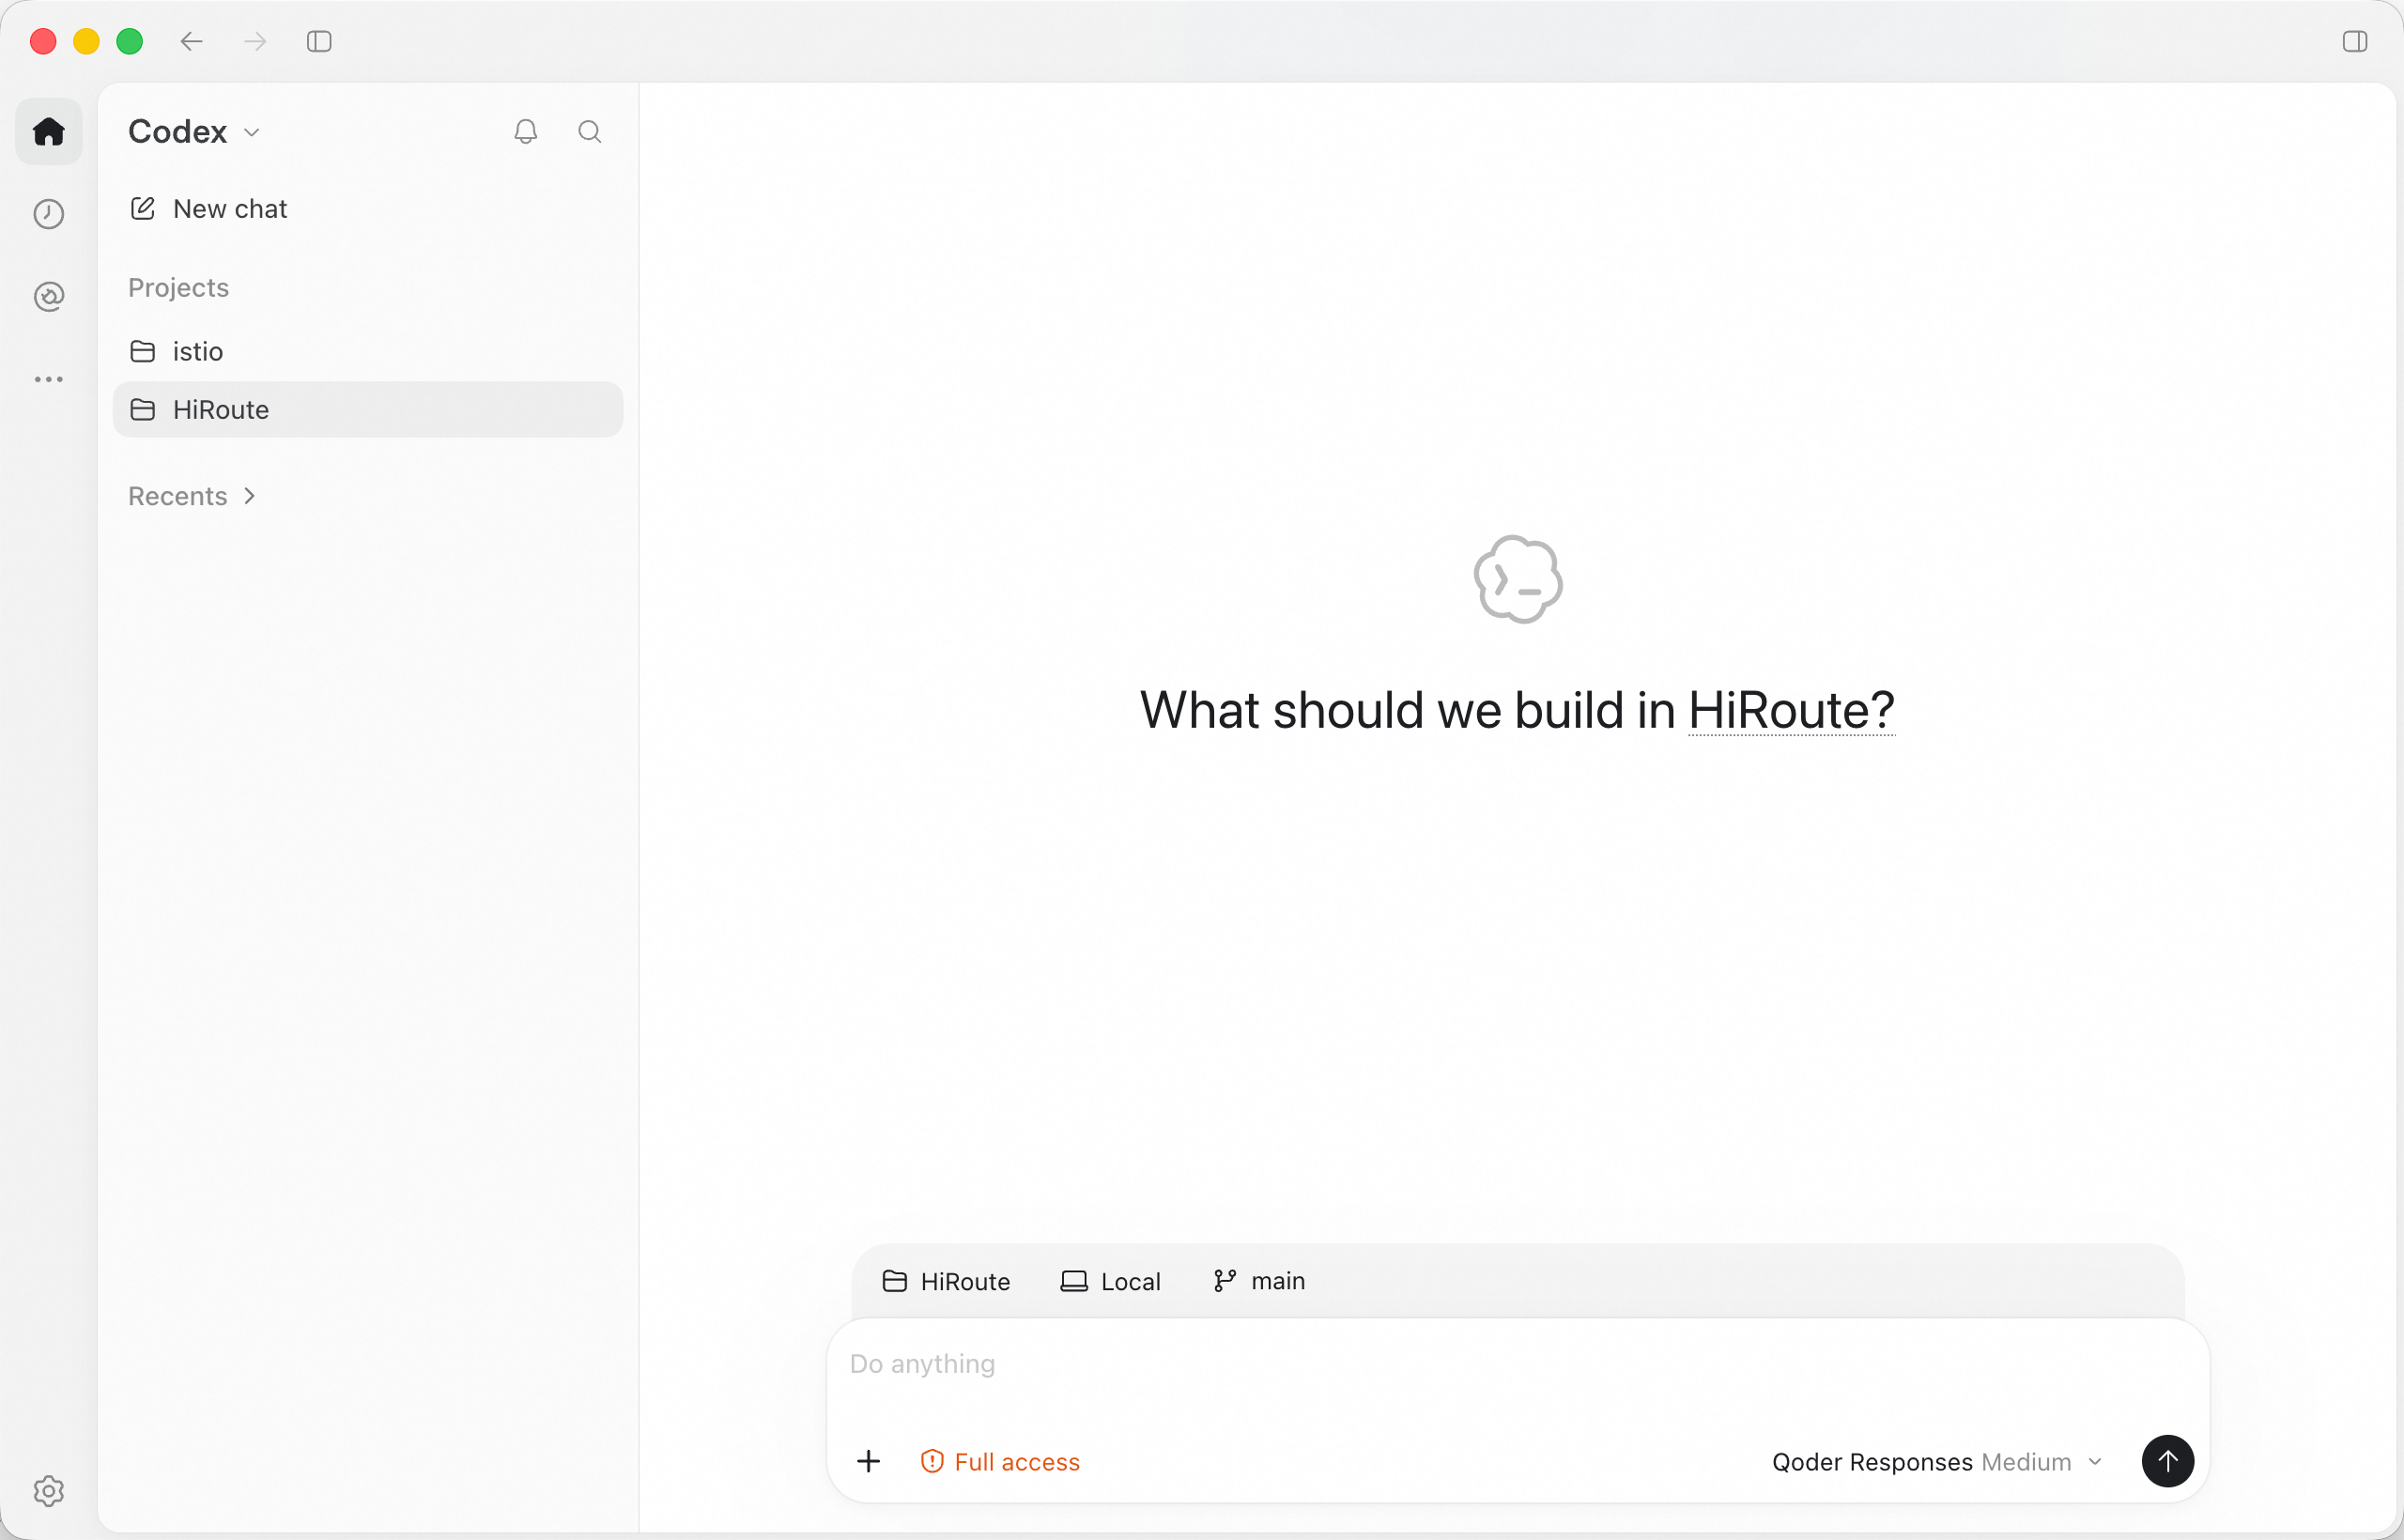
- Choose a project in the new window and click New chat. Confirm or choose your new route in the model picker at the bottom right of the composer. Try “Find this project’s startup entry points and explain how they connect.” In HiRoute, open Sessions → Routing timeline to see the models selected.
After changing route settings, quit this instance and open it again with the same button.
Use Codex CLI
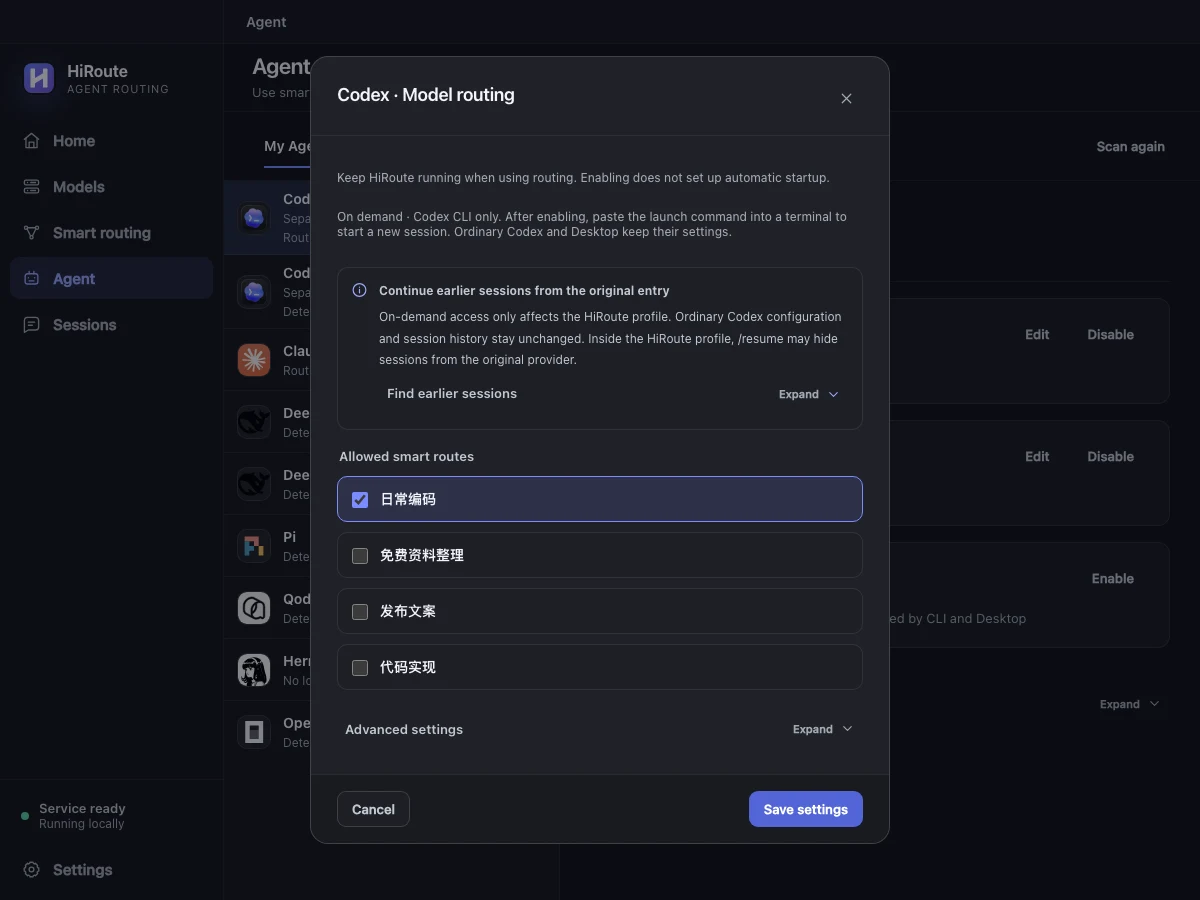
Open Agent → Codex → Model routing. Confirm On demand · CLI only under Advanced settings, then check the route you published. If Default selection appears, choose your route. Click Enable and copy launch command, then run the command in a terminal in your project.
Try a small task and inspect the actual model choices in HiRoute's session timeline.
4. Explore task delegation
When CI fails, let lightweight Pi sift through the logs while Codex focuses on diagnosing and fixing the problem. Give Pi an economical model that supports tool calls. The cheaper model processes the logs and tool output, and the main chat gets a short summary.
Create a Fixed model route called “Pi log triage”. Under More settings → Task delegation, allow delegation and choose Pi, describe its purpose and enable the route. Turn on delegation under Agent → Codex → Task routing. If you use the separate Desktop window, send the task from Codex CLI.
Use HiRoute to send this CI log to “Pi log triage”. Return the first failure, the relevant files and one command to reproduce it.
Ask Codex to retrieve the result. Confirm the executor in Agent → Task history, then check the model and usage in Sessions → Routing timeline. Set up lightweight Pi delegation